First Steps with Nodemcu

These days I’ve started some experiments with Nodemcu . Past few years I’ve experimented with Atmel and PIC microcontrollers and needed to refresh my knowledge with new mircocontrollers 🙂 .

Here is a picture of my new toy and it is Nodemcu version 3.0 by third party Chinese manufacturer LoLin and its I/O expander board.

Note that this development board is only new to me and not new for the diy hobbyists all over the world 😀 .

This microcontroller manufactured by chinese company called “espressif” and they manufactured many variants of this “esp” chip for many wireless communication applications.


20181223_180236

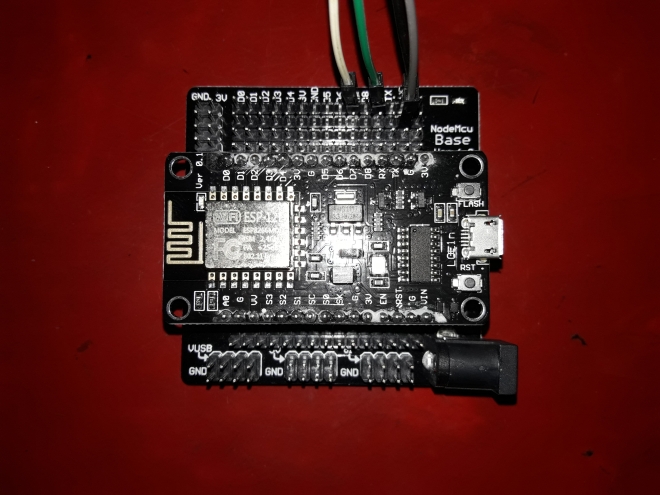
This board has some GPIO (General Purpose Input Output) features like other microcontrollers and specially the builtin WiFi facility (There is no builtin Wifi on Atmel AVR and PIC microcontrollers 😦 , we have to add it externally as a module) .

I’ll show you in future how to play with this gadget 🙂  and for today I think this is enough !

Have a nice day 😀 !


First Steps with Nodemcu

Simple DIY hardware hack to prevent address conflicts on I2C devices

Recently I’m doing some experiments with RaspberryPi SBC’s I2C bus and encountered some errors with devices that have the same address . One device is DS1307 with an eeprom( 24C32) and the MPU6050 DMP module that I’ve got from ebay.

d444a63a07bbf3b5080acf6133246edf-arduino-clocks

f04878-mpu-6050-module-3-axis-analog-gyro

Both DS1307 and MPU6050 hold the hexadecimal address 0x68 . So the RaspberryPi’s I2C bus is confused when detecting the two devices. Then I’ve searched for the options . The DS1307 address can’t  be changed , it’s fixed one . So I have to choose the second option. Ground the AD0 pin of MPU6050 with VCC pin . So I soldered a little wire connecting both AD0 and VCC pins together shown as in below figure.

20072017396

So after doing this simple diy hack the MPU6050’s device address should be 0x69. OK , let’s test the addresses that connected to the I2C bus of the RaspberryPi using the following command.

$ i2cdetect -r 2

So this is the result I’ve got 😀

i2c_address_changed

Aha 🙂 that diy hack worked well!.

That s it 🙂

Now I’m ready to continue the experiment .

Important :- In this experiment I’ve used MPU6050 as a test device and it has AD0 pin. Here I’ve change the pin logic to 0 to 1 and that changed the  device address 0x68 to 0x69. Also keep in mind that this is a one method. Some I2C devices has software based address changing methods . In that type of devices we must read the manual and use a special firmware to change the I2C device address. We can use Arduino like microcontroller to run that special firmware to do that task.  

Have a nice day !

Image