Ha Haa don’t get confused what I’m going to talk about 😀 . In this post I’m going to show you how to get your hands dirty with “Rust Language” 😀 .
Rust is a system programming language focused on safe concurrency. Rust is originally designed in Mozilla Labs by Graydon Hoare . You already know about popular ” Servo Rendering Engine project” created at “Mozilla Labs ” that is capable of parallel tab processing . Inspired by that parallel processing mechanism modern ” Mozilla Firefox Quantum Browser Project ” was created that is faster than old “Gecko Rendering Engine” 🙂 based Mozilla Firefox Browser.
That is enough about that 🙂 . So let’s get to know how to setup your personal computer for “Rust Language” . Here I’ll show you configure it on your ubuntu linux machine. The Ubuntu version that I have used here is “18.04 LTS”. and the rust version is 1.45.0 . You’ll need curl as prerequisite for the installation . If there is no curl you can install it via curl as below.
sudo apt install curl Then to install rust issue the following commands
curl https://sh.rustup.rs -sSf | shAccording to official documentation following command also work like a charm
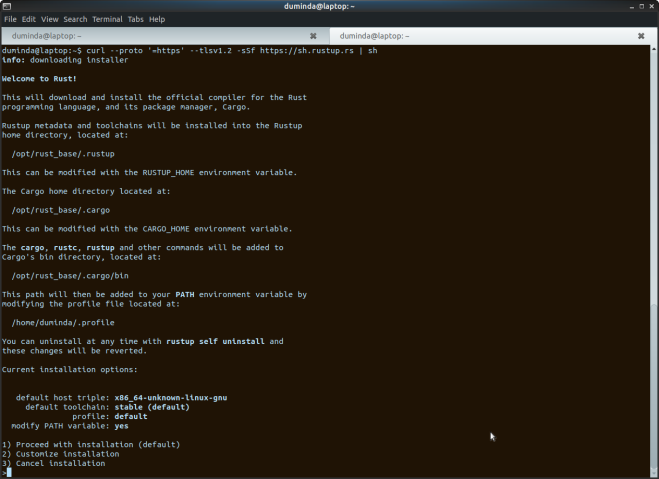
curl --proto '=https' --tlsv1.2 -sSf https://sh.rustup.rs | shAfter issuing the one of two above commands the following screen will be appeared

Here we have three options 1,2, and 3 .
1) Proceed with installation (default)
2) Customize installation
3) Cancel installation
It is better to choose 1st option to continue to the default installation ( This will install the basic development tools 🙂 ) . I’ll describe about the 2nd option in the next post 🙂 .
After the there are two directories created in the “/home/user/” directory named “~/.rustup” and “~/.cargo” .
Here the rust language versioning and tool updates managed by rustup tool and above first directory for that purpose . The all Dev-tools are installed in the “~/.cargo/bin” directory.
After the installation issue the following command(s) in the terminal
rustup --version
rustup 1.22.1 (b01adbbc3 2020-07-08)
rustc --version
rustc 1.45.0 (5c1f21c3b 2020-07-13)cargo --version
cargo 1.45.0 (744bd1fbb 2020-06-15)Here rustup is the version management tool that manages the rust versions (ex :- nightly builds,stable version etc).
Here cargo is the package manager for rust and crate host .
Ok that is the basic development installation for rust 🙂 .
Bus that is not enough 😦 . We have to define “RUSTUP_HOME” and “CARGO_HOME” environmental variables . For that issue the following command in the terminal
sudo vim ~/.bashrcThen add the lines as below ( this step must be do carefully )
export RUSTUP_HOME=/home/user/.rustup
export CARGO_HOME=/home/user/.cargo
export PATH=$PATH:$CARGO_HOME/bin
After that issue the following command(s) to make the changes permanent !
source ~/.bashrc

source ~/.profile
Then issue the following command(s) to ensure that all the settings are Ok 🙂 .
echo $RUSTUP_HOME
/home/user/.rustup

echo $CARGO_HOME
/home/user/.cargo
This is the basic steps of installation and configuration of the rust language .
Have a nice day and leave a comment if you face an issue while installation of rust language :- ) .